swiftui 通过tabview实现图片查看器

效果图

  • 核心思路为通过tabview包裹图片 然后设置样式.tabViewStyle(PageTabViewStyle()).indexViewStyle(PageIndexViewStyle(backgroundDisplayMode: .always))
  • 通过ZoomableScrollView组件实现图片的缩放,效果可以说是相当完美了
  • 感谢 jtbandes 真的是救我狗命
核心代码
1
2
3
4
5
6
7
8
9
10
11
12
13
14
15
16
17
18
19
20
21
22
23
24
25
26
27
28
29
30
31
32
33
34
35
36
37
38
39
40
41
42
43
44
45
46
47
48
49
50
51
52
53
54
55
56
57
58
59
60
61
62
63
64
65
66
67
68
69
70
71
72
73
74
75
76
77
78
79
80
81
struct ImageTabView: View {
@EnvironmentObject var imageTabViewEnviroment:ImageTabViewEnvironment

var body: some View {
VStack{
TabView(selection:$imageTabViewEnviroment.index) {
ForEach(0..<imageTabViewEnviroment.imageArray.count,id: \.self){ index in
ImageTabViewItemView(imageUrl: imageTabViewEnviroment.imageArray[index])
}
}
.tabViewStyle(PageTabViewStyle())
.indexViewStyle(PageIndexViewStyle(backgroundDisplayMode: .always))
}
.edgesIgnoringSafeArea(.all)
}
}

private struct ImageTabViewItemView:View {
@State var scale: CGFloat = 1
@State private var dragOffset = CGSize.zero
@State var imageUrl: String
var body: some View{
VStack{
ZoomableScrollView {
MyKingfisherView(urlStr: imageUrl)
}
}
.frame(height:UIScreen.main.bounds.height)
.clipped()
}
}

struct ZoomableScrollView<Content: View>: UIViewRepresentable {
private var content: Content

init(@ViewBuilder content: () -> Content) {
self.content = content()
}

func makeUIView(context: Context) -> UIScrollView {
// set up the UIScrollView
let scrollView = UIScrollView()
scrollView.delegate = context.coordinator // for viewForZooming(in:)
scrollView.maximumZoomScale = 20
scrollView.minimumZoomScale = 1
scrollView.bouncesZoom = true

// create a UIHostingController to hold our SwiftUI content
let hostedView = context.coordinator.hostingController.view!
hostedView.translatesAutoresizingMaskIntoConstraints = true
hostedView.autoresizingMask = [.flexibleWidth, .flexibleHeight]
hostedView.frame = scrollView.bounds
scrollView.addSubview(hostedView)

return scrollView
}

func makeCoordinator() -> Coordinator {
return Coordinator(hostingController: UIHostingController(rootView: self.content))
}

func updateUIView(_ uiView: UIScrollView, context: Context) {
// update the hosting controller's SwiftUI content
context.coordinator.hostingController.rootView = self.content
assert(context.coordinator.hostingController.view.superview == uiView)
}

// MARK: - Coordinator

class Coordinator: NSObject, UIScrollViewDelegate {
var hostingController: UIHostingController<Content>

init(hostingController: UIHostingController<Content>) {
self.hostingController = hostingController
}

func viewForZooming(in scrollView: UIScrollView) -> UIView? {
return hostingController.view
}
}
}
swiftui简单的实现选项卡效果,同时初次加载

swiftui简单的实现选项卡效果,同时初次加载

pageView code
1
2
3
4
5
6
7
8
9
10
11
12
13
14
15
16
17
18
19
20
21
22
23
24
25
26
27
28
29
30
31
32
33
34
35
36
37
38
39
40
41
42
43
44
45
46
47
48
49
50
51
52
53
54
55
56
57
58
59
60
61
62
63
64
65
66
67
68
69
70
71
72
73
74
75
76
77
78
79
80
81
struct PageView<SelectionValue, Content>: View where SelectionValue: Hashable, Content: View {
@Binding private var selection: SelectionValue
private let indexDisplayMode: PageTabViewStyle.IndexDisplayMode
private let indexBackgroundDisplayMode: PageIndexViewStyle.BackgroundDisplayMode
private let content: () -> Content

init(
selection: Binding<SelectionValue>,
indexDisplayMode: PageTabViewStyle.IndexDisplayMode = .automatic,
indexBackgroundDisplayMode: PageIndexViewStyle.BackgroundDisplayMode = .automatic,
@ViewBuilder content: @escaping () -> Content
) {
self._selection = selection
self.indexDisplayMode = indexDisplayMode
self.indexBackgroundDisplayMode = indexBackgroundDisplayMode
self.content = content
print(selection)
print(indexDisplayMode)
print(indexBackgroundDisplayMode)
}

var body: some View {
TabView(selection: $selection) {
content()
}
.tabViewStyle(PageTabViewStyle(indexDisplayMode: indexDisplayMode))
.indexViewStyle(PageIndexViewStyle(backgroundDisplayMode: indexBackgroundDisplayMode))
}
}

extension PageView where SelectionValue == Int {
init(
indexDisplayMode: PageTabViewStyle.IndexDisplayMode = .automatic,
indexBackgroundDisplayMode: PageIndexViewStyle.BackgroundDisplayMode = .automatic,
@ViewBuilder content: @escaping () -> Content
) {
self._selection = .constant(0)
self.indexDisplayMode = indexDisplayMode
self.indexBackgroundDisplayMode = indexBackgroundDisplayMode
self.content = content
}
}

struct TestPageView1:View {
var body: some View{
Text("1")
.onLoad {
print("初次加载1")
}
}
}
struct TestPageView2:View {
var body: some View{
Text("2")
.onLoad {
print("初次加载2")
}
}
}
struct TestPageView3:View {
var body: some View{
Text("3")
.onLoad {
print("初次加载3")
}
}
}

struct Test_PageView:View {
@State var selection = 1
var body: some View {
VStack {
Text("Selection: \(selection)")
PageView(selection: $selection, indexBackgroundDisplayMode: .never) {
TestPageView1()
TestPageView2()
TestPageView3()
}
}
}
}
onLoad code
1
2
3
4
5
6
7
8
9
10
11
12
13
14
15
16
17
18
19
20
21
22
23
24
25
26
27
struct ViewDidLoadModifier: ViewModifier {

@State private var didLoad = false
private let action: (() -> Void)?

init(perform action: (() -> Void)? = nil) {
self.action = action
}

func body(content: Content) -> some View {
content.onAppear {
if didLoad == false {
didLoad = true
action?()
}
}
}

}

extension View {

func onLoad(perform action: (() -> Void)? = nil) -> some View {
modifier(ViewDidLoadModifier(perform: action))
}

}

docker安装jenkins

1.拉取镜像

命令
1
docker pull jenkins/jenkins:latest

2.构建shell

命令
1
2
3
4
5
docker run -d -u root -p 你的端口:8080 \
-v /home/ubuntu/docker-v/toolJenkins/jenkinsHome:/var/jenkins_home \
--restart=always \
--name toolJenkins \
jenkins/jenkins:latest

3.配置镜像

3.1修改hudson.model.UpdateCenter.xml配置文件

命令
1
2
3
4
5
6
sudo vim /home/ubuntu/docker-v/toolJenkins/jenkinsHome/hudson.model.UpdateCenter.xml

默认路径
http://updates.jenkins-ci.org/update-center.json
改成路径
http://mirror.xmission.com/jenkins/updates/update-center.json

3.2修改default.json配置文件

命令
1
2
3
4
5
6
sudo vim /home/ubuntu/docker-v/toolJenkins/jenkinsHome/updates/default.json

默认路径
"connectionCheckUrl":"http://www.google.com/"
改为路径
"connectionCheckUrl":"http://www.baidu.com/"

docker安装nginx

1.拉取镜像

命令
1
docker pull nginx:latest

2.运行shell

命令
1
docker run --name service-nginx -p 8084:80 -d nginx

p映射端口
d后台运行
v挂在目录,可以根据需求自行设置


ps:根据自定义配置

1.创建配置文件

命令
1
1. vim /home/jmlib/docker-v/serviceNginx/nginx.conf

2.配置详情

配置
1
2
3
4
5
6
7
8
9
10
11
12
13
14
15
16
17
18
19
20
21
22
user  nginx;
worker_processes auto;

error_log /var/log/nginx/error.log notice;
pid /var/run/nginx.pid;


events {
worker_connections 1024;
}


http {
include /etc/nginx/mime.types;
default_type application/octet-stream;
log_format main '$remote_addr - $remote_user [$time_local] "$request" '
'$status $body_bytes_sent "$http_referer" '
'"$http_user_agent" "$http_x_forwarded_for"';
sendfile on;
keepalive_timeout 65;
include /etc/nginx/conf.d/*/*.conf;
}

3.构建shell命令

服务
1
2
3
4
5
6
7
8
9
10
11
docker run -d \
--restart=always \
-p 8084:8084 \
-p 8085:8085 \
-p 8086:8086 \
-p 8087:8087 \
-p 2192:2192 \
-v /home/jmlib/docker-v/nginx/nginx.conf:/etc/nginx/nginx.conf \
-v /home/jmlib/docker-v/nginx/conf.d:/etc/nginx/conf.d \
-v /home/jmlib/docker-v/nginx/www:/etc/nginx/www \
--name nginx nginx
公司服务
1
2
3
4
5
6
7
docker run -d \
-p 80:80 \
-v /Users/lizihan/Desktop/docker-v/nginx/nginx.conf:/etc/nginx/nginx.conf \
-v /Users/lizihan/Desktop/docker-v/nginx/conf.d:/etc/nginx/conf.d \
-v /Users/lizihan/Desktop/docker-v/nginx/www:/etc/nginx/www/lizihan \
-v /Volumes/研发部代码/nginx/www:/etc/nginx/www/company \
--name nginx-company nginx

常用配置

nginx转发端口
1
2
3
4
5
6
7
8
server{
listen 80;
server_name test.sakikun.com;

location / {
proxy_pass http://61.153.125.171/:2189; # 转发规则
}
}
nginx转发端口 ssl认证
1
2
3
4
5
6
7
8
9
10
11
12
13
14
15
16
server{
listen 443;
server_name steam30off.sakikun.com;
ssl on;
#从腾讯云获取到的第一个文件的全路径
ssl_certificate /etc/nginx/conf.d/key/1_steam30off.sakikun.com_bundle.crt;
#从腾讯云获取到的第二个文件的全路径
ssl_certificate_key /etc/nginx/conf.d/key/2_steam30off.sakikun.com.key;
ssl_session_timeout 5m;
ssl_protocols TLSv1 TLSv1.1 TLSv1.2;
ssl_ciphers ECDHE-RSA-AES128-GCM-SHA256:HIGH:!aNULL:!MD5:!RC4:!DHE;
ssl_prefer_server_ciphers on;
location / {
proxy_pass http://127.0.0.1:2191; # 转发规则
}
}

ubuntu20.04 LTS安装docker

1.卸载旧版docker

命令
1
sudo apt-get remove docker docker-engine docker.io

2.更新系统软件

命令
1
sudo apt-get update

3.安装依赖包

命令
1
2
3
4
5
sudo apt-get install \
apt-transport-https \
ca-certificates \
curl \
software-properties-common

4.配置阿里云密钥

命令
1
curl -fsSL https://mirrors.aliyun.com/docker-ce/linux/ubuntu/gpg | sudo apt-key add -

如出现:gpg: can’t connect to the agent: IPC connect call failed 这种问题,可以尝试:
1.sudo apt remove gpg
2.sudo apt install gnupg1
3.在执行 curl -fsSL https://mirrors.aliyun.com/docker-ce/linux/ubuntu/gpg | sudo apt-key add -

5.配置阿里云docker镜像

命令
1
sudo add-apt-repository "deb [arch=amd64] https://mirrors.aliyun.com/docker-ce/linux/ubuntu $(lsb_release -cs) stable"

6.执行安装

命令
1
sudo apt-get install docker-ce docker-ce-cli containerd.io

PS:用户组配置

docker ps -a 出现
Got permission denied while trying to connect to the Docker daemon socket at unix:///var/run/docker.sock: Get http://%2Fvar%2Frun%2Fdocker.sock/v1.24/containers/json?all=1: dial unix /var/run/docker.sock: connect: permission denied
sudo groupadd docker

命令
1
2
3
4
5
sudo groupadd docker #添加docker用户组

sudo gpasswd -a $USER docker #将登陆用户加入到docker用户组中

newgrp docker #更新用户组

docker安装mysql

1.拉取镜像

docker pull mysql:8.0

2.创建数据目录和配置文件

本地
1
2
3
mkdir /home/jmlib/docker-v/mysql8/data

mkdir /home/jmlib/docker-v/mysql8/cnf

3.创建配置文件

本地
1
vim /home/jmlib/docker-v/mysql8/data/my.cnf
服务
1
vim /home/jmlib/docker-v/mysql8/data/my.cnf
配置详情
1
2
3
4
5
6
7
8
9
10
11
12
13
14
15
16
17
[client]

default-character-set = utf8mb4

[mysqld]

datadir = /usr/mysql/data

character_set_server = utf8mb4

collation_server = utf8mb4_bin

secure-file-priv= NULL

symbolic-links=0

!includedir /etc/mysql/conf.d/

4.启动容器

本地
1
2
3
4
5
docker run -d  -p 3306:3306 \
-v /home/jmlib/docker-v/mysql8/data/my.cnf:/etc/mysql/my.cnf \
--restart=unless-stopped \
-e MYSQL_ROOT_PASSWORD=123456 \
--name mysql mysql:8.0
服务
1
2
3
4
5
6
7
docker run -d  -p 3306:3306 \
-v /home/jmlib/docker-v/mysql8/cnf/my.cnf:/etc/mysql/conf.d/my.cnf \
-v /home/jmlib/docker-v/mysql8/data:/var/lib/mysql \
-v /home/jmlib/docker-v/mysql8/home:/home \
--restart=always \
-e MYSQL_ROOT_PASSWORD=123456 \
--name mysql mysql:8.0

5.mysql初始化

初始化详情
1
2
3
4
5
docker exec -it mysql bash
mysql -uroot -p
use mysql
ALTER USER 'root'@'%' IDENTIFIED WITH mysql_native_password BY 'yiluxiangbei';
flush privileges;
SwiftUI解决隐藏NavigationBar后返回失效

SwiftUI解决隐藏NavigationBar后返回失效

获取小键盘高度

@ObservedObject private var keyboard = KeyboardResponder()
keyboard.currentHeight

通过小键盘高度判断是否需要添加灰色背景,点击灰色背景隐藏小键盘
1
2
3
4
5
6
7
8
9
10
11
12
13
14
if keyboard.currentHeight != 0 {
Color.gray
.edgesIgnoringSafeArea(.all)
.opacity(0.4)
.onTapGesture {
withAnimation(.spring()){
UIApplication.shared.windows.forEach { (window) in
if window.isKeyWindow {
window.endEditing(true)
}
}
}
}
}
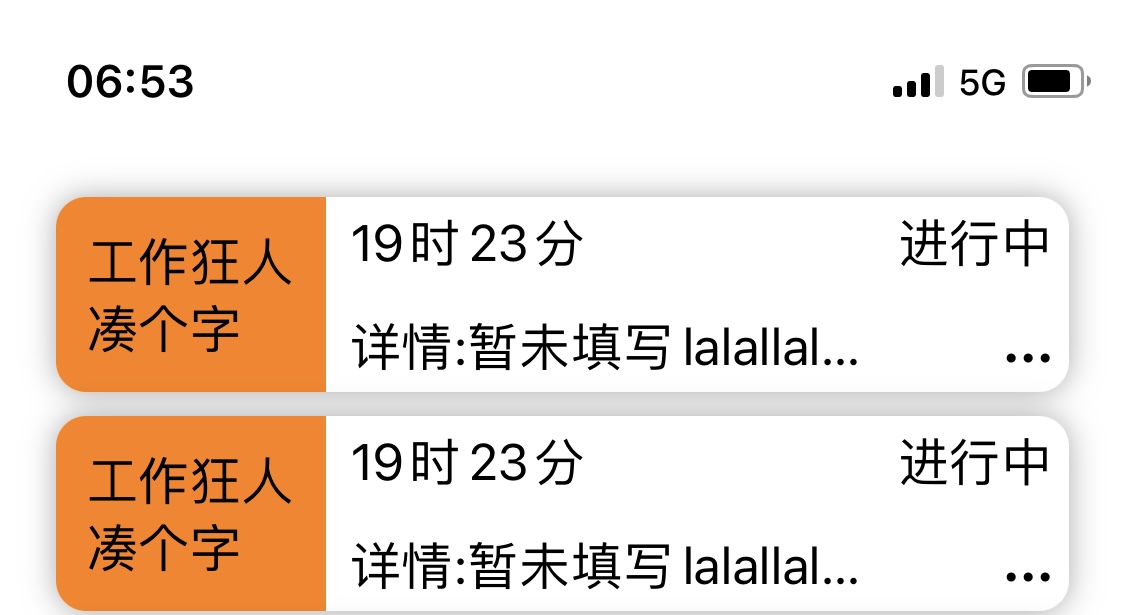
效果图

keyboardhandle.swift
1
2
3
4
5
6
7
8
9
10
11
12
13
14
15
16
17
18
19
20
21
22
23
24
25
26
27
28
29
30
31
32
33
34
35
36
37
38
39
40
41
42
43
44
45
46
47
48
49
50
51
import UIKit
import Foundation
import SwiftUI
import Combine
class KeyboardResponder: ObservableObject {
private var _center: NotificationCenter
@Published var currentHeight: CGFloat = 0

init(center: NotificationCenter = .default) {
_center = center
_center.addObserver(self, selector: #selector(keyBoardWillShow(notification:)), name: UIResponder.keyboardWillShowNotification, object: nil)
_center.addObserver(self, selector: #selector(keyBoardWillHide(notification:)), name: UIResponder.keyboardWillHideNotification, object: nil)
}

deinit {
_center.removeObserver(self)
}

@objc func keyBoardWillShow(notification: Notification) {
if let keyboardSize = (notification.userInfo?[UIResponder.keyboardFrameEndUserInfoKey] as? NSValue)?.cgRectValue {
currentHeight = keyboardSize.height
}
}

@objc func keyBoardWillHide(notification: Notification) {
currentHeight = 0
}
}

class KeyboardHeightHelper: ObservableObject {
@Published var keyboardHeight: CGFloat = 0

init() {
self.listenForKeyboardNotifications()
}
private func listenForKeyboardNotifications() {
NotificationCenter.default.addObserver(forName: UIResponder.keyboardDidShowNotification,
object: nil,
queue: .main) { (notification) in
guard let userInfo = notification.userInfo,
let keyboardRect = userInfo[UIResponder.keyboardFrameEndUserInfoKey] as? CGRect else { return }
self.keyboardHeight = keyboardRect.height
}

NotificationCenter.default.addObserver(forName: UIResponder.keyboardDidHideNotification,
object: nil,
queue: .main) { (notification) in
self.keyboardHeight = 0
}
}
}

:D 一言句子获取中...